|
These demos show how you can create applications that contain the Calendar bean, theme beans and plugin beans.
To see the wiring and run the application in VisualAge for Java 2.0, import the calendar jar file (in the lib directory) and the demo dat file (in the demo directory) into VisualAge for Java 2.0. The dat file contains a demo package that you can add to any project in your VisualAge for Java workspace. Use VisualAge for Java 's "Check Class Path..." option to compute the correct CLASSPATH setting before you run the demo application. This ensures that VisualAge for Java can locate all the classes needed to run the application.
This demo shows you how to use the Calendar bean in a simple application. It also shows how to use one of the existing themes and add functionality to the calendar bean by adding one of the available plugins.
The result of the application is shown in the following figure.
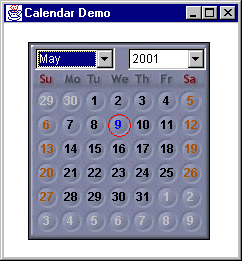
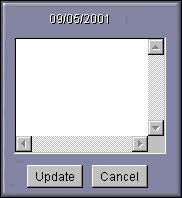
Figure 1 - runDemo1 Application
The functions shown in this example are simple:
To build the application, do the following:
this of
the BlueTheme to the inputTheme
property of the Calendar bean.this of the
NotePlugin to the inputPlugin.
property of the Calendar bean.onActionCanceledEvent
event of NotePlugin with visible()
property of Calendar bean and set the connection parameter to trueonActionPerformedEvent
event of NotePlugin with visible()
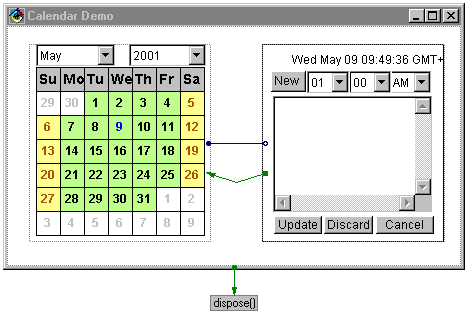
property of Calendar bean and set the connection parameter to trueThe wiring for this application is shown in the following figure.
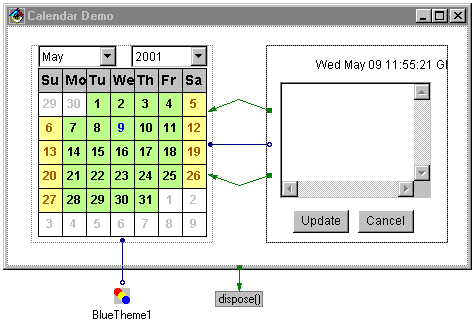
Figure 2 - runDemo1 Wiring Diagram
Demo2
This demo shows you how to add the DayPlugin bean to the Calendar.
The result of the application is shown in the following figure.
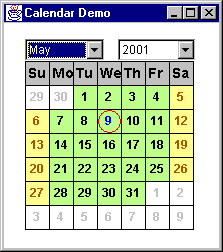
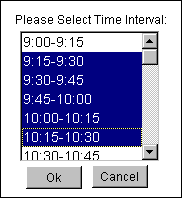
Figure 3 - runDemo2 Application
The functions shown in this example are simple:
To build the application, do the following:
this
of the DayPlugin to the inputPlugin property of the
Calendar bean.onActionCanceledEvent
event of DayPlugin with visible()
property of Calendar bean and set the connection parameter to trueonActionPerformedEvent
event of DayPlugin with visible()
property of Calendar bean and set the connection parameter to truetimeStep property, to a value in minutes (1-59).initialTimeInterval
property using its property editor. It
consists of start and end time of the interval in the day which will be divided into steps as given by
timeStep
property.timeFormat24h
property, if true 24 hour mode is used, if false 12 hour mode is used.The wiring for this application is shown in the following figure.
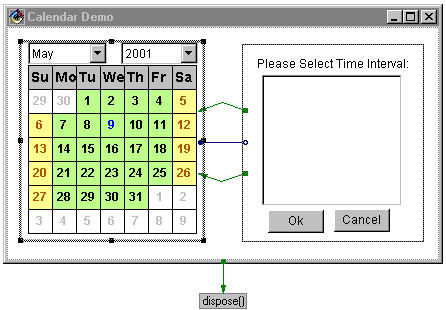
Figure 4- runDemo2 Wiring Diagram
Demo3
This demo shows you how to add the ToDoPlugin bean to the Calendar.
The result of the application is shown in the following figure.
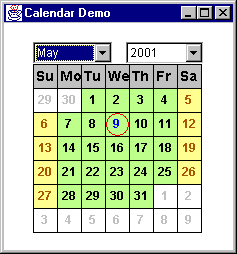
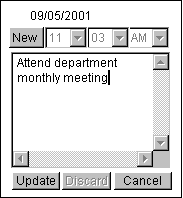
Figure 5 - runDemo3 Application
The functions shown in this example are simple:
To build the application, do the following:
this
of the ToDoPlugin to the inputPlugin property of the
Calendar bean.onActionCanceledEvent
event of DayPlugin with visible()
property of Calendar bean and set the connection parameter to true. Also check the Pass event data checkbox.The wiring for this application is shown in the following figure.
Figure 6- runDemo3 Wiring Diagram