![[]](../docs/images/beans_bg.gif)
![[]](../docs/images/beans_bg.gif)
|
This document contains a description of two demos, which show how you can create applications that allow performing cryptographic transformations of files.
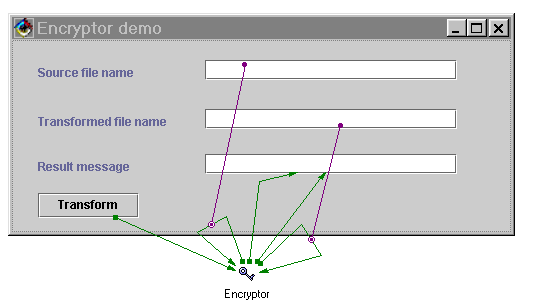
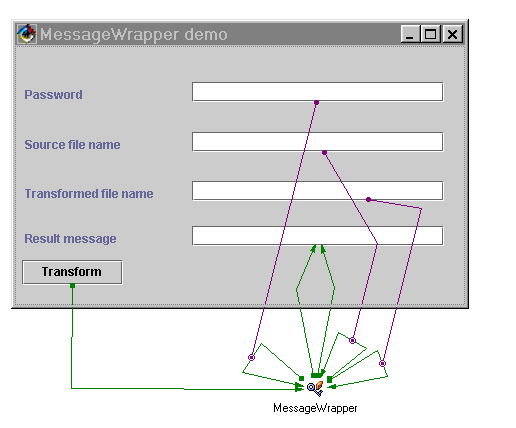
For information on how to create these applications using visual programming, see the Encryptor Demo and the MessageWrapper Demo wiring instructions.
To see the wiring and run these applications in VisualAge for Java 3.5, install Java Cryptography Extension 1.2.1 with cryptographic service providers and import them into Visual Age in accordance with the Installation Instructions. Then, import the CryptoBeans jar file (in the lib directory) and the demo dat file (in the demo directory) into VisualAge for Java 3.5. Use the VisualAge for Java's "Check Class Path..." option to specify the correct CLASSPATH setting before you run the demo application. This ensures that VisualAge for Java can locate all the classes needed to run the application. Add the project, which contains the CryptoBeans suite classes to CLASSPATH.
Note: These demos utilize default values of algorithm types, key sizes, and provider names. However, in more complicated applications you may need some other values. Algorithm type for encryption is of the "algorithm/mode/padding" form or just "algorithm", and corresponds to "transformation" in Java Cryptography Extension API. Each cryptographic service provider implements a number of cryptographic services and defines its own names for them. For more detailed information about algorithm names and corresponding key sizes see the Java Cryptography Extension API documentation as well as documentation supplied with your cryptographic service providers.
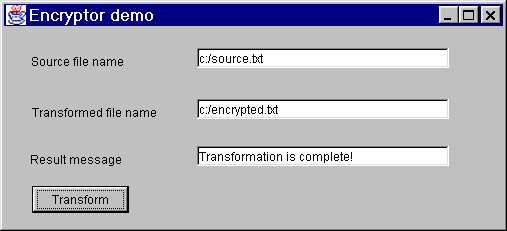
The first demo demonstrates the encryption of the file contents. The contents of the first file is encrypted by the Encryptor bean and written into the second file. Default transformation type (Triple DES in the CBC mode), cryptographic service provider (SunJCE), and key size (168 bit) are used. The key generated during the application execution is saved in the file with the default name “usedKey.key” in the current directory.
The result of the application execution is shown in the following figure:

The functions shown in this example are simple:
To build the application, do the following:
Make the following connections:
The wiring for this application is shown in the following figure.

Note: In the above application you may use the HashCalculator bean instead of the Encryptor bean. All the connections remain the same, but the result of the program execution is the hash value of the message.
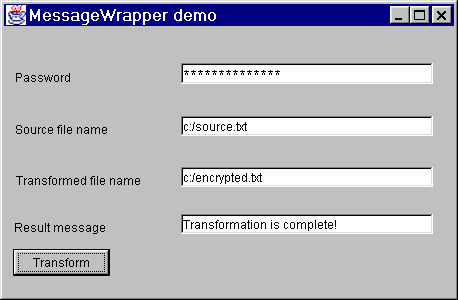
The second demo demonstrates wrapping of the file contents by means of the MessageWrapper bean. The contents of the file is encrypted with the password and wrapped into the second file. Besides, the encrypted file, its hash value, and some other parameters are wrapped so that it is possible to check the data integrity with the MessageUnwrapper bean. The demo uses default transformation types (PBEWithMD5AndDES for password-based encryption and Triple DES in the CBC mode for encryption), cryptographic service providers (SunJCE for encryption and SUN for hash function), and key size (168 bit).
The result of the application execution is shown in the following figure:

Enter the password in the Password password field. This password value is used for generation of the symmetric key for encryption.
Type the name of the source file in the Source file name text field. Pay attention that this should be a valid file name.
Type the name of the transformed (wrapped) file in the Transformed file name text field. This file is created as a result of the application execution.
Click the Transform button. The message regarding the transformation result is displayed in the Result message text field.
To build the application, do the following:
Make the following connections:
The wiring for this application is shown in the following figure.

Notes:
In the above demo you may use the PBEncryptor bean instead of the MessageWrapper bean. All the connections remain the same, but the result of the program execution is the file, which contains only the encrypted contents of the first file.
In the above demo you may use the MessageUnwrapper bean instead of MessageWrapper. All the connections remain the same, but MessageUnwrapper tries to decrypt the first file with the password and compare its hash value with the value wrapped into the file. As a result either the unwrapped file is successfully generated, or some event is fired. The incorrectPassword event allows checking, whether the right password is entered, and the contentsCorrupted event means that the wrapped file contents is corrupted.