Page
Table of Contents
Introduction ..………………………………………………………………………………………………………………………………………..……….2
General Overview …………………………………………………………………………………………………………………………………………..2
Creating an Account and Signing In ……………………………………………………………………………………………………………..3-7
Create Account / Sign In Screen …………………………………………………………………………………………………………3
Log In …………………………………………………………..…………………………………………………………………………………...4
Create Account - User Information …………………………………………………………………………………………………...5
Create Account - Vehicle Information ……………………………………………………………………………………………….6
Create Account - Credit Card Information ..………………………………………………………………..……………………..7
Search for Parking Lots ………………………………………………………………………………………………………………………………..8-9
Lot Selection Screen - Main View ……..……..……..……..……..……..……..……..……..……..……..……..…………...8-9
Add Money to the User’s Balance ………………………………..……………………………………………………………………………….10
Add Funds Screen ……………………………………………………......…………………………………………….………………….10
Purchase a Parking Pass ……………………………………………………………………………………………………………….………….11-12
Parking Lot Detail Screen …………………………………….....………………………………………………………………………11
Confirm Parking Pass Purchase ………………………………………………………………………………………………………..12
Navigating to Other Screens ..……………………………………………………………………………………………………………………….13
Slide Out Menu ……………………………………………………………………………………………………………………….........13
Updating Information ………………………………………………………………………………………………………………………………14-16
User Information …………………………………………………………………………………………………………………………….14
Vehicle Information …………………………………………………………………………………………………………………………15
Update Confirmation ………………………………………………………………………………………………………………………16
View and Update Current Passes …………………………………………………………………………………………………………….17-19
View Current Passes …………………………………………………………………………………………………………………..17-18
Update Current Passes …………………………………………………………………………………………………………………….19
Logging Out …………….……………….……………….……………….……………….……………….……………….……………………...........20
Fast Pass Parking
Introduction:
A user of a parking lot has a limited set of options to pay for their time used. They must either pre-purchase a ticket that is validated by an attendant on a timed basis, or park, pay for a ticket, return to their car to place the ticket in their vehicle, and then go about their business. If they ever need to change the time for parking, they must stop their current activity, return to the parking lot, and repeat the ticketing process. The process of paying for a ticket during high traffic times in the Orlando area can be time consuming. Fast Pass Parking is a mobile application that will solve the issue of waiting in lines to purchase parking passes. It will be used to expedite public parking in the Orlando area.
General Overview:
A user will begin by downloading Fast Pass Parking (FPP) from the App Store. After downloading FPP is complete, the user will be able to create an account with FPP. To create an account the user must enter in user, vehicle and credit card information. User information will include: Name, Email, Password, and Phone Number. Vehicle information will include: License Plate Number, State, Make, Model, Color, and Year. Credit card information will include: credit card type, credit card number, expiration date, and security code. Once the user creates an account, they will be able to sign in. A user will continue to be signed in until they manually sign out of the application. When they sign into the application, the user will enter the main screen of the application. The main screen will be a view of the current balance and a view of a map that has points representing the parking lots that endorse using FPP’s services. There will also be a list of the names of the parking lots that appear on the map, located beneath the map view. If a user clicks on a point in the map, then the application will move to a screen that shows the lot information and has the functionality to add parking time to the lot. This screen can also be accessed if a user clicks on the name of the parking lot in the list beneath the map view. A user will be able to update their parking time whenever they choose to after the initial purchase of lot time. Once the time on the parking pass runs out though, the user will not be able to update that pass. They will need to buy a new pass at this point. Users will also be able to update their user information and vehicle information at their convenience.
Creating an Account and Signing In:
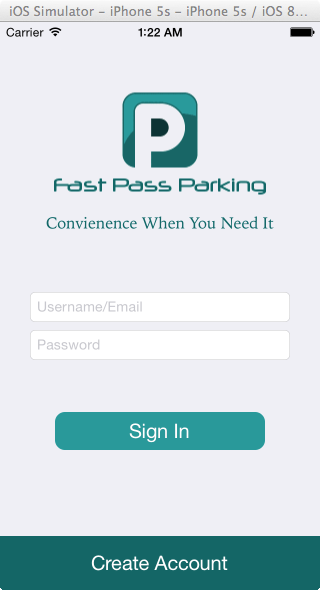
Create Account / Sign In Screen:
From the create account / sign in screen the user has the option to create an account or sign into a current account.
Log In:
When a user logs into their account they will type their username/email address into the top text field. This will appear as plain text. The user will then enter their password. The password text field will be masked so onlookers cannot easily look at the user’s password.
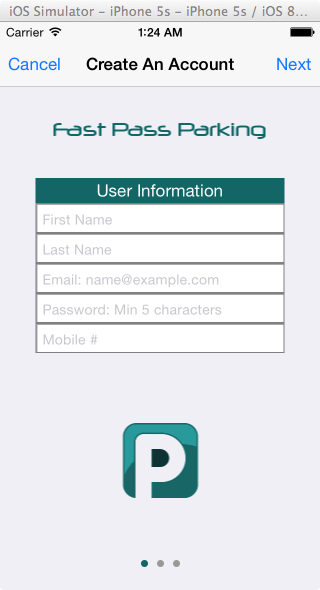
Create Account - User Information:
Once the user presses the create account button, they will be sent to a screen where they can enter their user information. The user will enter their information and press next. Cancel will take the user back to the create account / log in screen.
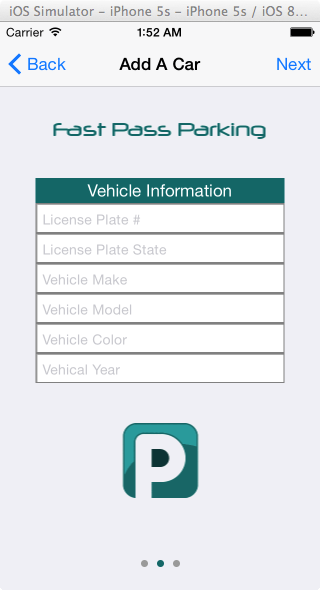
Create Account - Vehicle Information:
Once the user presses the next button on the screen where they entered their user information, they will be sent to a screen where they can enter their vehicle information. The user will enter their information and press next. The back button will take the user back to the previous screen.
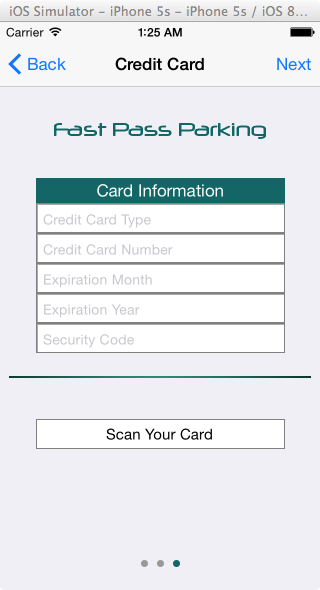
Create Account - Credit Card Information:
Once the user presses the next button on the screen where they entered their vehicle information, they will be sent to a screen where they can enter their credit card information. The user can enter their credit card information in two ways. The user can either scan their card or enter their information manually. The user will enter or scan their information and press next to complete their account set up. The back button will take the user back to the previous screen.
Search for Parking Lots:
Lot Selection Screen - Main View
When a user signs in, they are greeted by a map that displays their current location, and nearby parking lots. A polygon and a pin are placed in the map that represent the parking lot areas. There is an accompanying list for the map that mirrors those nearby parking lots. The polygons, pins, and the table rows may all be selected to navigate in to the individual Lot Detail Screens. To move the map location the user must slide their finger along the map in the direction they want to move it. There is also a zoom function, which is enabled by pinching / spreading your fingers on the map. Zooming out the map will result in viewing pins instead of polygons. To view the polygons again, the user must zoom back in until polygons representing the parking lots reappear.
Polygons:
Pins:
Add Money to the User’s Balance:
Add Funds Screen:
On the lot selection screen there is a plus symbol in the upper right hand corner. If a user presses on the plus symbol, then the add funds screen will appear. From this screen the user will be able to add funds to their balance from a range of $1.00 to $25.75. Once the user enters their desired amount and presses the “+ Add Funds” button, the balance at the top of the parking lot selection screen will be updated with the new amount.
Purchase a Parking Pass:
Parking Lot Detail Screen:
Once a polygon, pin, or table row is clicked the user is navigated to the individual Parking Lot Detail Screen for the selected parking lot. This screen will show the parking lot name, address and how much it costs per hour to park there. The user will have the option to choose how many hours they wish to park at the parking lot for. To choose an amount of time to park for, the user must slide up / downward on the dials above the park button. The user has the option to create a parking pass between the range of 15 minutes and 12 hours and 45 minutes. The user cannot create a pass for 0 hours and 0 minutes and must have enough funds for the pass they are purchasing or an error message will appear when the user clicks park.
Confirm Parking Pass Purchase:
Once the user has the desired amount of time selected for a parking lot and presses the park button, a confirmation screen will appear. The screen will show the user how many hours and minutes they chose to park for. It will also show how much money that amount of time will cost the user. If the user presses the cancel button, then they will be sent back to the parking detail screen. If the user clicks “OK”, then they will be redirected to the main screen and the user’s balance will be updated to the new amount resulting from the transaction.
Navigating to Other Screens:
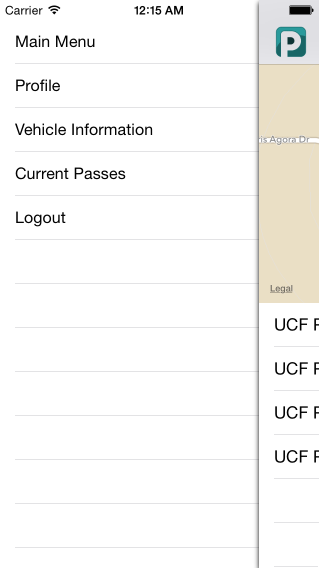
Slide Out Menu:
On the main screen there is the Fast Pass Parking logo in the top left corner. If the user clicks on the logo, a slide out menu will appear from the left side of the screen. It will have a list of options that include: Main Menu, Profile, Vehicle Information, Current Passes, and Logout. If a user wants to navigate to one of these screens, they will click on the name of the screen in the list of their choice and it will redirect them to that screen. If the user does not want to navigate to a new screen they can click the Fast Pass Parking logo again and it will put the slide out menu away.
Updating Information:
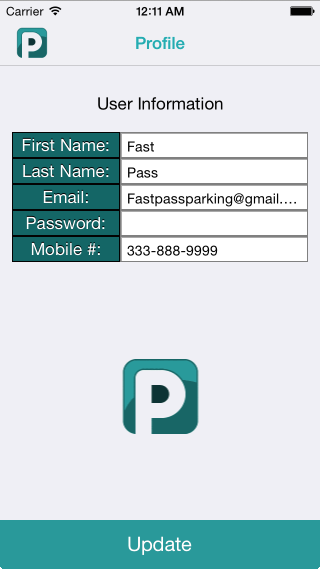
User Information:
If the user wants to update their user information, then they must open the slide out menu and click the table row that says “Profile”. The user will then be redirected to a screen that has a list of the current user’s user information. Each field will be filled except the password field. This is for security purposes. If the user does not want to update their password then they should leave the password field blank. If they want to change their password then they should type in the new desired password into the blank password field. To change any other user information, the user will modify the desired field. Once all modifications are complete, the user must press the update button. The system will display a confirmation when the update is complete.
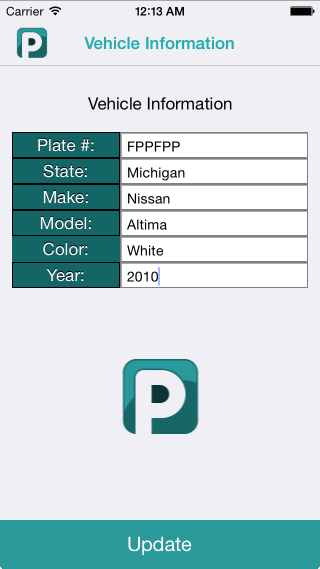
Vehicle Information:
If the user wants to update their vehicle information, then they must open the slide out menu and click the table row that says “Vehicle Information”. The user will then be redirected to a screen that has a list of the current user’s vehicle information. To change a user’s vehicle information, the user will modify the desired field. Once all modifications are complete, the user must press the update button. The system will display a confirmation when the update is complete.
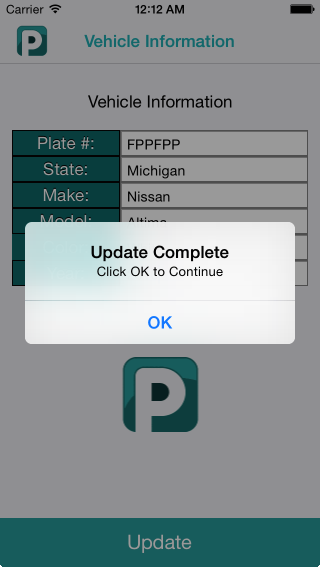
Update Confirmation:
Once the update is complete, the system will display a message showing that the system has completed the modifications. The user must click “OK” to continue. This message will appear on both the update user and vehicle information screens after the update button is pressed and the update is complete.
View and Update Current Passes:
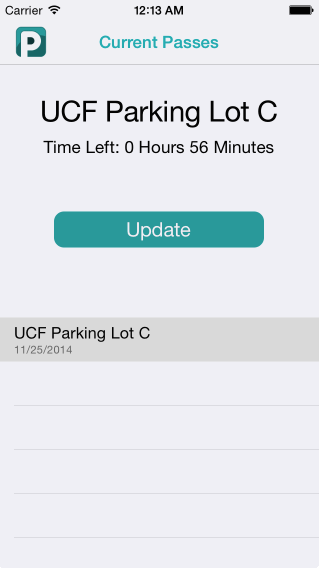
View Current Passes:
If the user wants to view their current passes, then they must open the slide out menu and click the table row that says “Current Passes”. Once the current pass screen appears, if there are no current passes then the screen will say “No Current Passes”. If the user does have current passes, then the parking pass that has the least amount of time left on it will appear at the top of the screen. There will be a list of the five highest priority passes, based on least amount of time left on the pass, which can be viewed. If a parking pass is pressed in the list, then the information about that parking pass will appear at the top of the screen.
With Current Passes:
Without Current Passes:
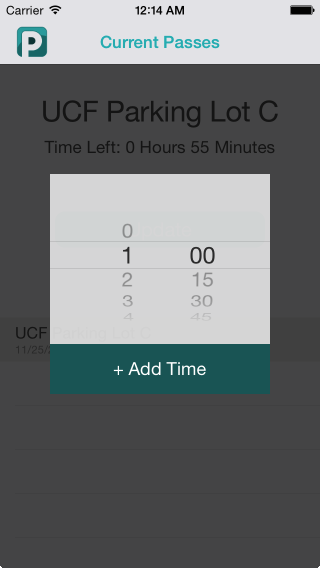
Update Current Passes:
Once the user has selected a current pass, an update button will appear. If the user wants to update the time for that parking pass, they must click the update button. Once the update button is clicked, a screen allowing the user to add time will appear. The user can add from 15 minutes to 12 hours and 45 minutes. Once the desired amount of time is selected, the user must click the “+ Add Time” button to complete the transaction. The user cannot update a parking pass for 0 hours and 0 minutes and must have enough funds to update the current parking pass for the amount of time they are purchasing or an error message will appear when the user clicks the “+ Add Time” button.
Logging Out:
If the user wants to logout, then they must open the slide out menu and click the table row that says “Logout”. The user will then be redirected to the create account / login screen with the most recent user’s email automatically populating the field where the user enters their email.